Glancing light
What is Glacing Light?
“Glancing light” is the term most commonly used to describe a critical lighting condition which exists when light hits a painted surface at an acute angle and casts shadows that highlight any surface irregularities.
Whilst glancing light is not a problem in itself, this critical lighting condition can accentuate any uneven variations in the plasterboard itself, especially the appearance of joints. It can highlight other surface irregularities, such as variations in sheen, texture or surface uniformity, that may still be present after walls and ceilings have been painted.
Why?
When looking directly at a painted surface, the light has a tendency to scatter before it comes back to your eye, which can ‘trick’ the eye into seeing a very even surface. As the angle of viewing becomes more acute or critical, the amount of non-scattered light reflected back to the eye is increased and surface imperfections therefore become more visible.
Surfaces that are very smooth (non-textured) or glossy will reflect more light rather than scatter it. The more the light is reflected, the more visible the surface imperfections become.
How does it occur?
When designing a building it is vital to fully consider the effects that both natural and artificial light can have and how light will impact (positively or negatively) painted surfaces throughout the whole day.
Glancing Light conditions are most commonly found in the following situations:
Brightly lit rooms
Windows directly adjacent to walls
Windows at the end of long corridors
Windows that span from floor to ceiling
Unshaded ceiling lights
Ceiling mounted fluorescent lights
Wall lighting (especially upward facing)
Downlights located close to walls
Other design features that interfere with the way light is reflected or scattered
New homes before blinds or curtains have been installed
Particular attention should be given to mornings and evenings when light from the sun casts elongated shadows across painted walls and ceilings which can magnify any surface variations present.
Final Appearance: The painted surface should exhibit uniform colour, sheen, opacity and film thickness along with freedom from painting defects such as brush or roller marks, spray pattern texture irregularities and other inconsistencies.
To avoid glancing light issues, it is recommended that visual inspections of finished surfaces be carried out in normal daylight conditions, between the hours of 10am and 2pm. No torches or artificial light to be used.
Also, the inspection of a particular surface should be carried out (as per the diagrams) at a distance of 1.5 to 1.8 metres and viewing angles should be 90° & 30°. Viewing at more acute angles or under strong illumination is not an endorsed method or standard therefore should not be imposed.
Differences in appearance will occur however where such differences are not clearly visible from a viewing distance of 1.5 to 1.8 meters, then the finish is considered “Acceptable” according to AS/NZS 2311 (2009).
Solution
Positive design steps will need to be taken prior to painting, in order to minimze the adverse effects that critical lighting may have on painted surfaces. The selection and positioning of internal lighting plays a vital role. The installation of curtains, blinds and awnings should also be part of the solution.
Please note that blemishes and surface irregularities cannot always be hidden by paint.
Careful patching and filling will be necessary to eliminate all serious defects.
Minor but numerous irregularities in existing broadwall areas can be minimized by skim coating the entire affected surface with a specially designed plasterboard primer/surfacer type paint (spray applied), such as Dulux Professional® FastFinish™ Level 5 prepcoat, followed by detailed fine sanding prior to the application of the acrylic sealer/undercoat and decorative topcoats.
Prevention
Client expectations can only be satisfied by carefully specifying both the level of finish and the level of decoration required on the ceilings and walls for each room of the building, at the design stage.
For best results on a new plasterboard surface, AS/NZS2311: “Guide to the Painting of Buildings”advocates that a sealer/undercoat followed by two coats of water based topcoat should be applied as a minimum.
Roller application, using the correct nap sleeve and application technique, will impart the desired soft texture to the surface that is necessary for effective light scattering conditions.
If spray application is employed, the final coat (including the prepcoat if not sanded) should be backrolled while the paint is wet, to again create a soft but uniform textured finish.
The selection of paint colour also needs to be considered carefully. Light colours will diffuse light much more effectively than dark colours and can thereby minimize the effects of glancing light.
The choice of paint sheen level can also have a direct and significant impact on the visual appearance of the painted surface, especially when glancing light conditions are present. A dead flat sheen level is recommended for ceilings and a matt or low sheen finish will provide best all round properties and visual appearance on broadwall surfaces.
In situations where dark colours and/or higher sheen levels (satin, semi-gloss or gloss) are needed, it is recommended to specify and install a level 5 finish on plasterboard in accordance with AS/NZS2589 (2007), in order to avoid glancing light issues.
References
Further information on the installation, fixing and finishing of plasterboard can be found in the Australian Standard AS/NZS 2589 (2007) “Gypsum Linings – Application and Finishing” or by contacting the Association of Wall & Ceiling Industries (AWCI) AUS & NZ (www.awci.org.au)
Detailed information on the preparation and painting of plasterboard can be found in the Australian Standard AS/NZS 2311(2009) “The Painting of Buildings” Sections 2.4.5 and 3.12.
Detailed information on the preparation and painting of plasterboard can also be found in the Dulux Technical Advice Note – “Levels of finish for plasterboard and their decoration”.
More paint problem solutions
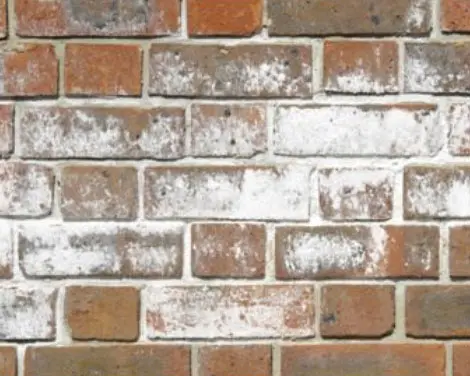
Efflorescence
Efflorescence is the deposit of crusty white mineral salts that appear on a masonry surface such as concrete, render, brick or mortar.
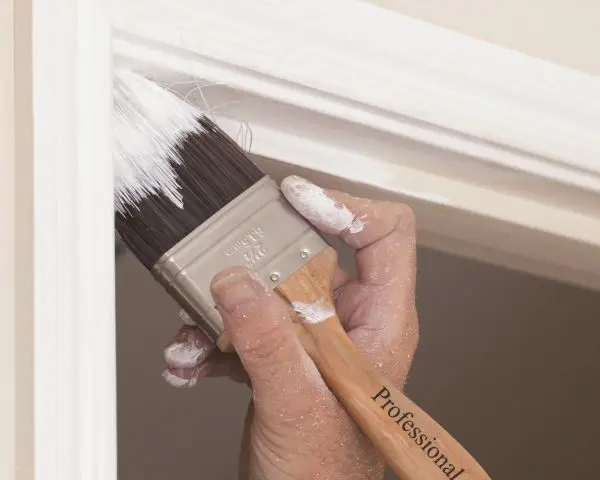
Paint touch up
Discover how to touch up a small area of a newly painted surface to conceal repairs to minor damage or to cover up small surface defects.
Water-based versus oil-based enamel paints
Discover the differences between water-based and oil-based enamel paints.

Drying and hardening of water-based paints
All water-based paints undergo a “drying process” involving two distinct phases, evaporation and coalescence.
Get detailed information about the physical and chemical properties of our products.
Advice for those challenges that arise in your busy and varied days.
Browse Dulux specifications, product datasheets, substrate information and safety data sheets.